If you want to stay balanced and mobile as you age, paying attention to your hips is non-negotiable. Your hips are the cornerstone of your movement, and the good news is that you can strengthen them just by weaving specific daily activities into your routine. We spoke with the pros who explain six daily exercises that can recover hip strength more quickly than heavy weight training after age 55.
The Importance of Training Your Hips
As the years pass, consistent resistance training becomes your best friend. Without it, you begin to lose substantial amounts of lean muscle every decade.
Dr. Derek Ochiai, a Board-Certified Arthroscopic Hip Surgeon and Sports Medicine Expert, explains that because your hip muscles—including the glutes—are such large muscle groups, they often experience the most significant muscle loss due to aging.
The hip joint is one of the most mobile joints in your body, capable of moving through several planes of motion. However, modern habits like sitting for long periods mean we often underuse these vital muscles. Dr. Amir Hakim, PT, DPT of FYZICAL Therapy and Balance Centers, notes: “The lack of movement compounded over the years leads to degeneration. Even when we do move, we often only move in the sagittal plane (front and back). There is very little lateral or rotational movement, causing the glutes to weaken and atrophy. You don’t use it, you lose it.”
While Dr. Ochiai clarifies that low-load exercises aren’t a total substitute for heavier weights, both are essential for avoiding falls and maintaining range of motion.
1. Dumbbell Goblet Squats
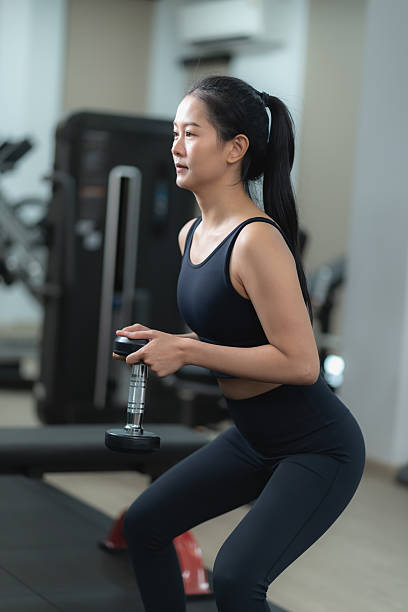
According to Dr. Ochiai, goblet squats are a powerhouse for strengthening. If you need to, you can even start these using a chair for support.
- How to do it: Start by taking a tall stance with your feet slightly broader than your shoulders.
- The Grip: Using both hands, hold a dumbbell in front of your chest with your elbows tucked down and pointed toward the floor.
- The Move: Keeping the weight steady, squat by hinging at the hips and bending your knees.
- The Depth: With your back straight, squat as far as you safely can.
- The Finish: Push through your heels to return to the starting position.
- The Goal: Finish three sets of ten repetitions.
2. Step-Ups
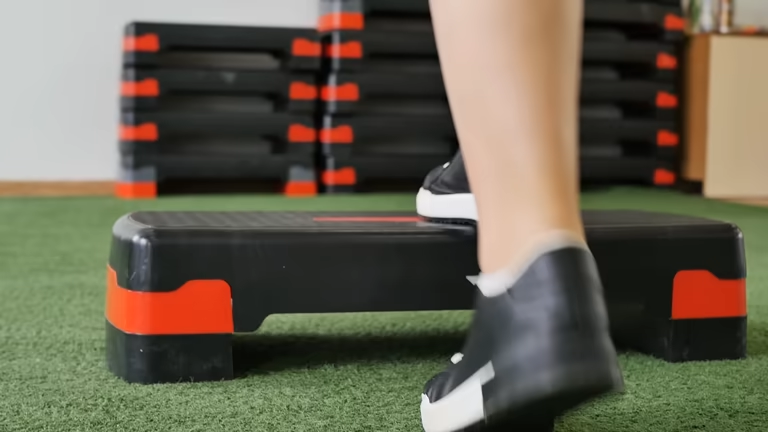
Step-ups are excellent for developing real-world balance. Dr. Ochiai suggests starting with small dumbbells in each hand to increase the challenge.
- The Setup: Stand erect facing a step at knee level, a plyometric box, or a firm exercise bench. Hold a dumbbell in each hand.
- The Foundation: Maintain a strong core and a tall chest, planting your left foot firmly on the surface.
- The Lift: Push through your left heel to raise your body until your left leg is straight and you are standing on the surface.
- The Descent: Use control to return to the starting position.
- The Switch: Repeat the movement on the opposite side.
- The Goal: Perform three sets of eight repetitions on each leg.
3. Alternating Split Squats
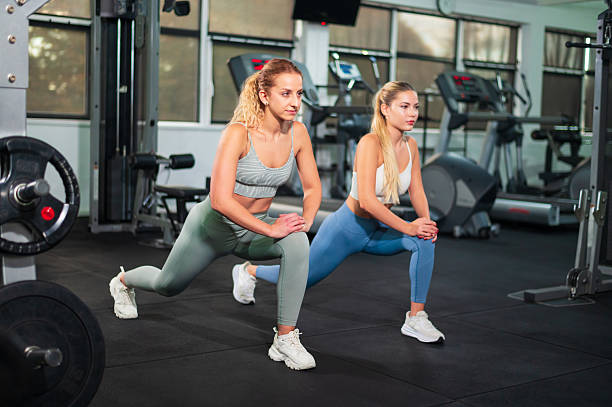
Dr. Ochiai notes that these are challenging, so keep your weights modest at first and focus on your form.
- The Start: Take a tall stance and place your hands on your hips or in the center of your heart.
- The Stance: Move your left foot forward by two to three feet to create a staggered stance.
- The Drop: Lower your bottom toward the floor by bending both knees (the bend should be equal in both knees).
- The Return: Push through your front heel to get back up.
- The Switch: Take a forward stride with your right foot, bend both knees, and descend toward the ground before standing back up.
- The Goal: On each side, complete three sets of six repetitions.
4. Planks
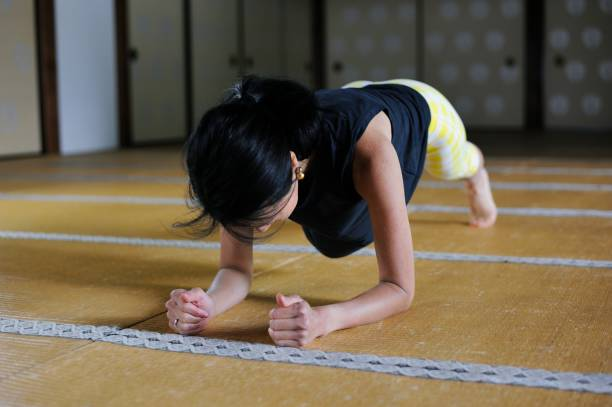
Strength in the hips and back go hand-in-hand. If a full plank is too difficult, Dr. Ochiai advises starting with your knees on the floor.
- The Alignment: Put your hands directly beneath your shoulders.
- The Engagement: Press into the pads of your fingers while hugging your inner arm toward your armpit. (Alternatively, you can drop onto your forearms).
- The Stance: Extend your feet to a hip-width distance.
- The Hold: Pull up through your quadriceps, tighten your buttocks, and contract your abs.
- The Goal: Try to hold your plank for two 20-second repetitions. Increase to 3 reps as you progress.
5. Clamshell
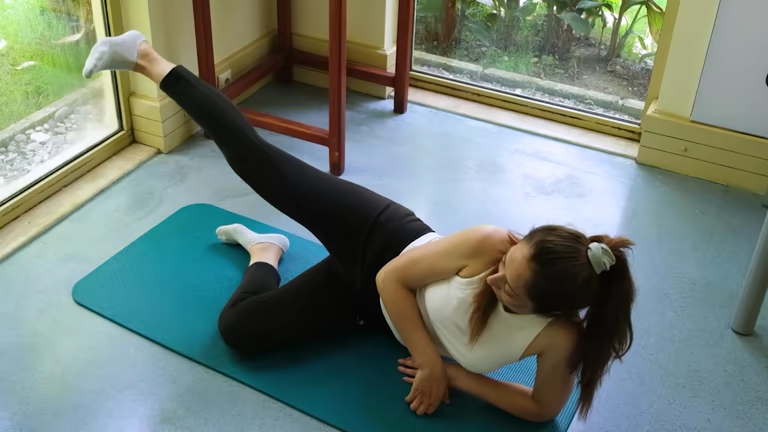
Bent-knee clamshells are perfect for firing up those hip stabilizers.
- The Setup: Lie on your side and place a Theraband between your legs (just above the knees).
- The Move: Keeping your feet together, lift your upper knee like a clamshell opening.
- The Control: Lower the knee back down slowly.
- The Tip: Be careful not to turn or rotate your lower back during the movement.
- The Goal: On each side, complete three sets of six repetitions.
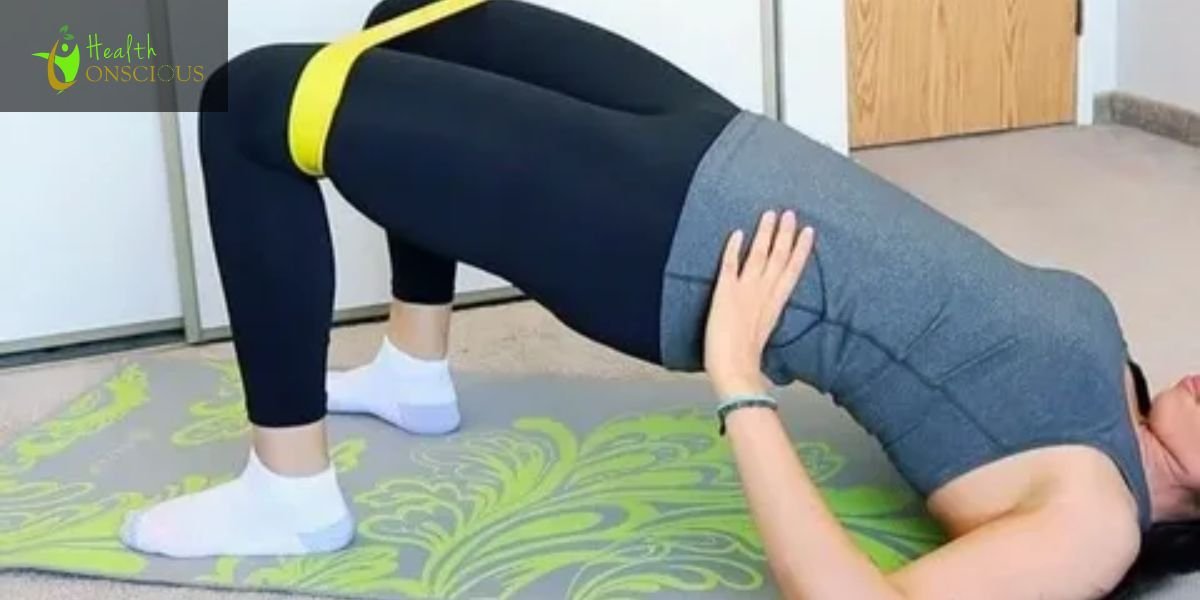
6. Banded Glute Bridges
- The Start: Lie flat on your back with your knees bent and feet hip-width apart. Place your arms at your sides with palms pressing into the floor.
- The Band: Attach a loop resistance band just above your knees.
- The Lift: Press through your heels to lift your hips until your body forms a straight line from your head to your heels.
- The Squeeze: Hold and squeeze your buttocks at the top of the movement.
- The Finish: Lower your hips to return to the starting posture.
- The Goal: Do as many repetitions as you can in three sets.
Read more: